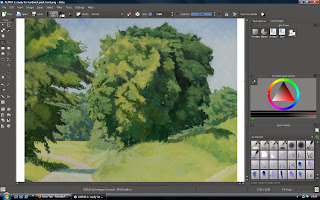
Study for Hardwick park


Attention, art loving gift givers. Christmas approaches, and with it the need to buy gifts for your nearest and dearest.

And what better or more appropriate Christmas gift than a 5-pack of postcard reproductions of a small painting of Hardwick park in sunny Derbyshire on a sweltering day in July?

This is available in the UK for a very reasonable and post free £3.25. Just click on the Paypal button below and my mighty publishing empire will spring into action to make sure your handsome postcard pack is delivered to your door post haste.


How to get a postcard of your painting printed.

Painting is hard. Promoting your work on top of that can be an uphill struggle, which is why using printed material to do the job for you is a good idea.

Perhaps you have an online presence already, but a hard copy of your work, in the form of a printed postcard reproduction of one of your best paintings, is a calling card you can send to galleries or potential buyers. If it's pretty, it gets to stick around, a real world, lasting reminder to everyone who sees it that you're out there.

I finally got around to doing this last week, and thought I'd do a step by step in case anyone else was wondering how to go about it.

Step 1: Choose your image.

This can be the hardest part. Make it as easy as you can, like this...

Gather all the potential images you think could make a good postcard. Stick them into one folder on your desktop.

Choose recent images over past successes, to better represent the kind of work you do now. Pick your best work - you know which of your paintings are better than the rest. And lastly, pick paintings that have impact. You want an image you can read all the way across the room when it's only as big as a postcard.

Open the images in Windows photo gallery, or whatever slide show viewer your system supports. Click through them, one by one. Take your time. Narrow down your choices. Keep the proportions of the finished postcard in mind. An A6 standard sized card is 148mm x 105mm, around five and seven eighths by four and one eighth inches, or roughly 3:2. Remember your painting might not fit those proportions exactly, and that you may have to leave space around your image.

Got the picture you want? Sure? Stick with it. Once you've made a choice, remember that the investment is small enough that any second thoughts don't really matter. Don't second guess yourself.

Step 2: Prepare your image with GIMP.

Now you have to get the image print ready.

Is the image you chose the best image possible of the painting? It needs to be good quality, sharp and clear, with accurate colour and tone. That murky snapshot you took on a dull day with your phone set to potato? Yeah, don't use that. It won't magically turn into a high quality pin sharp printed card. 


There are articles online about how to take good pictures of your artwork, just a Google search away. I use a DSLR set to 200 ISO and photograph my paintings flat on the floor lit by direct sunlight. Using my legs as a tripod..., well, bipod anyway, I stand directly over the piece and make sure I photograph it square on. Not recommended for larger pieces, but good enough for small paintings.

I make JPGs at the highest setting, 3872 x 2592 pixels, which seem to be adequate. I open them in GIMP, and cut them down to the outline of the painting like this: use the Rectangle Select tool to draw a box around the painting, then go to Image, Crop to Selection. I also use the brightness and contrast tool under the colour menu - lowering the brightness and increasing the contrast, just a little, gives a full bodied, colourful and contrasty image.

Make an A6 postcard template in GIMP, like this. Open a new, blank image - File, New - with the following specifications:

1712 pixels wide by 1228 pixels high (assuming a horizontal image).
Under 'Advanced Options', make sure its X and Y resolution is set to 300 pixels per inch. The colour space is RGB, which we'll talk about in a while.

Now, resize your painting's image so it fits neatly into that blank template. Don't distort the painting's original proportions to make it fit. Make sure that it's no bigger than 1712 x 1228 pixels, and that its dpi count is the same at 300 pixels per inch. You can do this is GIMP by accessing Image, Scale Image, and Image, Print Size.

Copy your image by going to Edit, Copy Visible. This copies your image to the clipboard. Close your painting image, then go to the blank template and choose Edit, Paste As, New Layer. This will place your image in the postcard template, where you can move it about until you're satisfied with the layout, using the move tool from the Toolbox. (Looks like a cross made of arrows.) If there's space around your image, make sure it's symmetrically placed.

When you're happy with the result, go to Layer, Merge Down. Then export it to your desktop as a PNG file.

But we're not done yet...

Step 3: Prepare your image with KRITA.

GIMP, like a lot of Open Source software, is a marvellous, highly specified program which will do many things really well.

But it won't export to CMYK, which is what printers want.

You could bite the bullet and buy Adobe Photoshop (or just pirate it should you be so inclined, NOT THAT I WOULD EVER RECOMMEND OR CONDONE SUCH A COURSE OF ACTION IN ANY WAY, at least not while any patent lawyers are listening) or...

You could download some more Open Source free software. It's called Krita, you can download it here and it's an interesting drawing and painting package with a complicated front end which I haven't the patience to learn properly but which can convert your image to CMYK and output a printer ready PDF file.


Go to Image, Convert Image Colour Space, Model: Cyan Magenta Yellow Black, Depth: 32 bits float. I have no idea what the other options mean, but I think they set the hyperdrive for Arcturus. Press OK, and wait while your computer huffs and pants through the process.

Then, File, Export as PDF, and Robert is indeed your father's brother. That PDF file is what you're going to upload to the printer. Along with another one for the rear of the postcard, where you will include the title of the piece and whatever contact information you want to put on there, be it a URL or an email address. You can make that in GIMP using the same postcard template which you already saved as 'A6 postcard template', right? Use the GIMP text tool, which gives you complete control over font choice, style, colour and size. When it's done to your liking, go through the same process to prepare the PDF for the rear of the postcard.

Step 4: Pick a printer online.

This is the part which could have you curling up into a foetal ball and whimpering softly.

Or, if you live in the UK, you could just do what I did (after a lot of Googling and cursing) and go with Printed.com.

No, I'm not an affiliate, nor do I get any kind of backhander for recommending them. Like any firm I promote on here, it's as a direct result of their good service.

I picked them because my first choice led me all the way through the order process only to lose me at the checkout when I found out their delivery charges cost twice as much as my order, because they were based overseas.

Printed.com, on the other hand, are based in the UK, use the ordinary post, and only charged me a few quid for delivery. Also, their website's online ordering process was easy to use, and their prices compared very favourably with the other online printers I looked into. 

Using their online order process, I uploaded PDFs of the face and rear of the postcard and paid for my order.

Ordered online on a Friday night, my postcards turned up neatly and securely packaged the following Wednesday morning.

And that's how to get a postcard of your painting printed. I must admit to having been a little worried while I waited. My monitor isn't calibrated, and I've had one disaster with an online photo printer returning photographs so dark you could barely tell what they were, but this postcard turned out really well. I'm more than happy with the result, and I'll be using Printed.com again.


Hardwick II: The return of the native. Or maybe the return of the herd.


A year after my first Hardwick painting expedition I went back on a Saturday in July, hauling my portable easel and a rucksack crammed with cameras and drawing books.

Unfortunately, the suntan lotion got left behind, which is a mistake you should not make if you're going out plein air painting in this weather. Also, take water. And a hat. At some point I'll write a post about the necessary kit for plein air survival in different seasons, including a special section on the appropriate hat.

My painting spot was a little way down the hill on the road that goes past the Hardwick Inn. I worked sight size on a 10" x 12" panel, drawing with a small brush. The good thing about the Winsor & Newton oil primer is that in the early stages of a painting you can wipe out mistakes with some turpentine on a rag and make it look like they never happened, something I had to do twice over before I was happy with the drawing.

I painted for close on three hours, which was only possible because the spot was shaded by trees. Passers by came and went, and were universally polite. If you look busy enough, they hardly ever interrupt you. I knocked it on the head around 2 and strolled home.

Happy enough with the resulting painting, I went back the next Saturday to finish that panel and begin the next one. 


On the way back from that trip I stopped to draw a tree in a field on the far side of Rowthorne. It made me think about what attracts me to a subject, just what it is I see that'll have me standing there in front of it for an hour or more, trying to get it on paper. Sometimes it's the textures, as much as anything. In this case, the silken heads of a barley crop, which will translate directly into juicy brush marks in an oil painting, or be lifted out with a a wet brush and tissue paper in a watercolour. The soft edged darkness below the tree in the middle of the barley. The lazy perspective of a ragged hedgerow taking your eye back towards the luminous sky. Some days, the world looks like a length of gorgeous fabric.


On the third visit to Hardwick, I found the missing cattle, which had hitherto been absent. They huddled in patches of shade around my painting spot, eyed me like members of the Conservative Women's Association inspecting a vagrant, and pooped on the ground occasionally. They are very decorative cattle, with impressive horns, straight out of a Bewick woodcut. I took a few photographs of them when I had time, and started a drawing from those later. 


Downloading a cow's anatomy illustration helped to sort out how they're put together, and after that it went well, so my finished Hardwick painting may contain livestock. I'm just happy they didn't try to kill and eat me.

At some point I'll spend the necessary six quid to peruse the gardens around the hall, and take photographs for a possible painting of it. (This is how I know I'm getting old. Small sums of money sound like large sums in my head. Six pounds is more than I used to spend in a weekend of carousing. Now it buys two beers or a single tube of paint.)

Surrounded by a wall, and perched at the top of its grounds, Hardwick Hall doesn't really lend itself to the full stately home treatment in terms of painting, but I think I could get a handsome picture out of it. I have black and white photographs from my last visit, back in the 80s, some of which you can see in the post. 


Some nice statuary in there. I'd quite like some statues for my own back garden. Perhaps I could make room beside the compost bin, and trim the privet behind it into topiary. I also have enough rocks to construct a modest grotto, in which I could sit to welcome visitors, lured in by the hand written sign leaning against the gatepost.

'Warburton Towers. This way to the gardens and tea room.'

Hmmm... how much to charge them for the guided tour?

'This patch of weeds is where the neighbour's cat likes to sit and ambush mice. That dustbin lid is where I scatter birdfood. Yes, those were peas, but the slugs got them all. Don't stray into the raspberry canes, it's like a Vietnam flashback in there.'


painting

Some days, painting is like ringing a bell. Other days, it's like pushing rocks uphill.

And some days - not too many, thankfully - painting is like trying to reverse an excitable bull out of a china shop without breaking anything, while keeping one eye peeled for whoopee cushions.

Seriously, do you ever have days at work when you just know that if you even think about making a single move something expensive will fall over, or catch fire, or probably both, for no good reason?

On those days you are the plaything of the fates,
and the best thing you can do is sit on your hands and resist any and all urges to do something useful. Because if you attempt anything - anything - at all, you will not only fail, but fail in so spectacular and horrifying a fashion that people will ever afterwards speak in awed tones of your abject incompetence, and cross the road when they see you coming. Just in case it's catching.

It's one of life's hardest lessons: some days, you can't do a damned thing right.

On those days, I kick back, do a crossword puzzle, maybe catch up on the gardening and odd jobs around the house. The ironing gets done. I might cut some MDF to size, or think about ordering some paint or brushes.

What I don't do is go near whatever painting I'm working on. Because it would explode.

I also don't worry about it. Because I know those days never come two together, and tomorrow will be great because I had a break.

My advice? If you break a window trying to get the screw cap off a tube of paint, you should maybe take the day off and do something else.


six monthly painting review

Back in March I spent a couple of hours sorting through what I'd done since last September in my six monthly review. A quarterly review is a good way to keep track of productivity, progress, and problem solving. If you can put a name to what you need to change, it's easier to handle.

In the past year, I'd started 30 paintings, and finished 24 of them, nine of which I wouldn't be thoroughly ashamed to frame and exhibit. Add to that 8 quarter imperial (11" x 15") drawings and about 120 drawing book pages.

In looking back through a year's worth of work I made a list of twelve points that need fixing in future paintings, which was the whole point of the exercise. When you spot your mistakes, you can give them the attention that will mend them. 


This year, I'm going to produce more. The aim is to produce enough viable paintings to stock several commercial galleries. That's going to be my main focus now I have my areas of competence mapped out, and systems in place to expand on those.

Does this sound too coldly mercenary? Well, with no other saleable skills*, and having developed an unfortunate predilection for paying my bills, wearing shoes, and eating six or seven times a day, it's necessary.

* Unless you need an ornamental hermit.

painters I found online

When I'm not painting I like to trawl the internet and see what painters I can find.

I found Duffy Sheridan's videos on YouTube, and they're well worth a look. His somewhat distracted* commentary gives great insight into the thought processes of a painter at work.  I recommend doing an image search of his paintings, they're gorgeous.

I came across Ryan S.Brown's landscapes while looking for another painter's work, and I eventually Googled him and found his website. That links to this splendid article about his work process as applied to a large landscape painting he did, as part of a Hudson River School Fellowship award.

* It's hard switching between painting mode and talking mode when you're working, as anyone who has made a YouTube instructional video will verify.

palette

Lately, I've noticed that my wide ranging palette has shrunk, to ten go-to pigments that cover all my needs:

Titanium White
Cadmium Red
Spectrum Orange
Cadmium Lemon
Oxide of Chromium
French Ultramarine
Permanent Mauve
Yellow Ochre
Raw Sienna
Burnt Umber


I have a paint mixing ritual which suits almost every painting: French Ultramarine and Burnt Umber, mixed to make a black. White added to this to make a range of greys. The black added to Oxide of Chromium for a shadow tone green, then separate greens mixed with Oxide of Chromium and Yellow Ochre and Cadmium Lemon, for the light side. The greys end up in the clouds, while sky blue is mixed from Ultramarine and white.

When things get too green, the Cadmium Red and Spectrum Orange kill the bilious notes and liven things up. The basic colours can be turned warm or cold as needed - yellow greens for grass, blue greens for nettles, violet blue for evening skies, cool blue for cool days.

So, shrinking palette, good or bad thing? It could be the main reason for my samey colour chord, as noted in this post, but that could equally be taken as a sign that I'm getting it right - I've accurately caught the colour scheme of the small patch of land I paint.

Some colours I stopped using because I found them too difficult. Viridian, for example, gives me problems. Too cold on its own, odd and out of place in tints, too assertive in mixed greens. It makes a good black, and beautiful greys, when mixed with Alizarin Crimson, but I currently have no use for those colours.

I've just started a small painting using a restricted palette, and I went with Burnt Sienna, Golden Ochre and Indigo as my red, yellow, and blue. Three primaries and their mixtures should be enough to take you through most of your colour solid, but the compromised colours of these three pigments provided an extra challenge. 


As an exercise, a restricted palette is good because it makes you think hard about colour choices, and really work the pigments you've allowed yourself. So far, the painting doesn't seem particularly less colourful than previous paintings that used a wider range of colours.

Next week I'm going further afield, so we'll see if I find new solutions for a new landscape. Meanwhile, here's a drawing of a horse in which I mucked up the head.


reworking a painting

I'm still working on that autumn landscape I talked about here.

The bigger the painting, the more stuff there is in it. Which means there's more to irk you every time you look at it. I'm an expert at seeing exactly what's wrong with my paintings, though less so at knowing how to fix them - and given that this one will probably be around long after I'm gone (unless Google has plans to upload everyone's consciousness to a computer*) and will have my name on it, I'd rather it looked as good as I can make it. 


Which means whenever I learn or think of a better way of doing certain things, I feel the need to update this painting.

I've painted the sky four times now. I've reworked the bush on the left twice, the stand of trees in the middle four times, the threadbare hawthorn on the right for the third time. And it looks better for it.

I've written about the dangers of overworking a painting, but this is more a case of learning as I go. From three plein air studies, a lot of drawings, a bunch of photographs, and a video clip, I've made a painting I'm not altogether ashamed of. That it's taken me over six months and I still don't feel it's quite done yet is slightly embarrassing, but I can live with that.

Recently I reworked two paintings I'd abandoned in 2009, unable to finish them as well as I wished.

But there's more than one way to skin a cat. The solution? I cut off the bad bits. I used right angled pieces of mount board to find the best places for the new edges, then used a Stanley knife and straight edge to cut the canvases down. I sawed pieces of MDF to size, and marouflaged the canvases to them with PVA. 


Result? Two problem free paintings, ready for framing. 


What moral can we laboriously draw from this slight tale? 


- Good painting takes time.

- Good painting takes skills you might not have right now but can acquire.

- Sometimes, you have to settle for what you can get, and a painting whose problems have been surgically removed is just as good as a painting whose problems have been solved.


In years to come, when my body has succumbed to strong drink, I shall download my psyche into a robot avatar** and continue to roam the lanes and paint. Occasionally thrashing my metallic arms about and firing lasers in an alarming manner.


* It'll be an option in their new TOS next year.

** I'll choose the 'Robbie' model, from Forbidden Planet


Photo credit: x-ray delta on Flickr.


imitation

'...To derive all from native power, to owe nothing to another, is the praise which men, who do not much think on what they are saying, bestow sometimes upon others, and sometimes on themselves; and their imaginary dignity is naturally heightened by a supercilious censure of the low, the barren, the groveling, the servile imitator. It would be no wonder if a student, frightened by these terrific and disgraceful epithets, with which the poor imitators are so often loaded, should let fall his pencil in mere despair; (conscious as he must be, how much he has been indebted to the labour of others, how little, how very little of his art was born with him;) and consider it as hopeless, to set about acquiring by the imitation of any human master, what he is taught to suppose is matter of inspiration from heaven....

...For my own part, I confess, I am not only very much disposed to maintain the absolute necessity of imitation in the first stages of art; but am of opinion, that the study of other masters, which I here call imitation, may be extended throughout our whole lives, without any danger of the inconvenience with which it is charged, of enfeebling the mind, or preventing us from giving that original air which every work undoubtedly ought always to have.

...From the remains of the works of the ancients the modern arts were revived, and it is by their means that they must be restored a second time. However it may mortify our vanity, we must be forced to allow them our masters; and we may venture to prophesy, that when they shall cease to be studied, arts will no longer flourish, and we shall again relapse into barbarism.

...Thus I have ventured to give my opinion of what appears to me the true and only method by which an artist makes himself master of his profession; which I hold ought to be one continued course of imitation, that is not to cease but with his life.'

The Discourses of Sir Joshua Reynolds. Discourse VI.

indigo

One of my recent oil paint purchases was a tube of Winsor & Newton Indigo.

I wasn't quite sure what I expected, but I knew from their literature and website that the paint would be a mixture of blue and black pigments.

The original indigo was named after the blue dye pigment obtained from the plant Indigofera Tinctoria. The cut plant was soaked and fermented in large vats, and its dark precipitate skimmed, strained, pressed, and dried into cakes of indigo pigment. 


Indigo, several hundred years ago, was better than the other blue pigments that painters had at their disposal, which, though they produced brighter blues, had their drawbacks. Ultramarine was expensive, as was greenish blue azurite. While smalt and blue verditer were cheaper, both offered limited tinting strength and hiding power. Both azurite and smalt could only be used when coarsely ground, which made paint of these pigments hard to handle in oil.

In comparison, indigo had better covering power and tinting strength, and was used in easel painting from the middle ages onwards. Sadly, it sometimes tended to fade rapidly if exposed to sunlight, as this interesting dissertation by M.H. van Eikema Hommes reveals. If you're determined to use genuine indigo, and you've a mind to grind your own paint, you can still buy it online.

Sir Isaac Newton added indigo to his spectrum, declaring it to lie between blue and violet, in an effort to maintain a conceptual connection between the colours of the spectrum and the seven notes of the musical scale. Modern colour scientists, along with the rest of us who have eyes, are somewhat sceptical that Newton's indigo exists at all, and generally call any wavelength in the 450nM region violet.


Indigo, then, is not so much a colour as a blurry notion of a colour. I have a dim memory of reading Graham Joyce's novel of the same name, which describes seeing indigo in the evening sky, through the skylight of an atrium in a particular building in Chicago, which seems to be an awful lot of trouble to go to. Just to add to the merry confusion that is colour naming, there are new varieties of indigo, each with their own definition. Electric indigo, for example, is the name given to a particular shade, which has the following painting package colour codes:

#6F00FF in hex
(111,0,255) in sRGB
(57,100,0,0) in CMYK


Winsor & Newton Indigo doesn't look like that, and it won't fade like the old indigo pigment. Made from a Pthalo blue, Ultramarine blue, and Carbon black pigments, it looks, obviously, like a blueish black. Mixed with white, it gives a range of lovely blue greys which work well on snow scenes, and one of which was the precise shade I saw from outside my back door just half an hour ago, in the swollen underside of a raincloud. 


It's a very nice colour. I'm going to be actively looking for excuses to use it.

colour chord

I just ordered some oil paint online and it set me thinking about the colours I habitually use in a painting.

Quite a lot of green - naturally, landscapes - but looking at a folder of paintings it seems I have a favourite colour solution to just about every painting: green, yellow ochre, grey, and blue. 


Would also make a nice sweater.


This isn't, I suspect, a bad thing. Other painters have their own favourite colour schemes, as can be confirmed by a casual look through a few books on painting.

I've been looking at David Briggs' website, to get a greater understanding of colour and how to use it. Ever since art college, I've used a colour solid as my conceptual toolkit for visualizing colours, and a warm/cool split palette for mixing them, but a recent reading of James Gurney's 'Colour and Light' had me reappraising my colour wheel.

The 'YURMBY' colour wheel he proposes adds cyan and magenta to the standard red, orange, yellow, green, blue, and violet. Finding a pigment match for a true magenta or cyan is the challenge, though with the addition of lemon yellow, just using these three as your primaries can help you, apparently, mix the greatest gamut of colours.

I might try a floral piece to give some of those pure primaries a workout. Most things I see when I'm out walking around here and looking for subjects are some variation on that green/ ochre/ grey/ blue chord. Trees, dirt, clouds, sky. Grass, fields, road...sky. It does give a calm, restful feel to the finished painting, but I think a change might be in order. 

My tube of unfinished red paint is probably older than most of your children. And perhaps even you.


I find I have to work on colour and tone consciously,
whereas drawing and composition come more easily. Which brings up a whole new set of questions, about whether it's best to play to your strengths or work on your weaknesses, but I'm too tired and intellectually challenged to go into that right now.

painting spring greens

I'm breaking one of my own rules by painting a landscape full of
those acidic, poisonous looking greens you only see in spring, when plants and trees are sprouting and in bud.

The trouble with green, of course, is that it's so... green. And in spring, it's even worse. But I set out to paint the shrieking lime green of new growth and the unlikely blue of a spring morning sky, and I think it might work out.

I started on site, with a 10" x 12" board painted in two sessions on location. Then the weather turned English again, and I carried on working on it indoors, from a photograph, sitting in front of my monitor. 


I love it when the weather finally warms up enough for things to begin to bud. The first sign around here is when the hawthorn hedges get a dusting of green, which happened a couple of weeks ago. Now, the woodland in particular has a distinctly confectionery look to it, all mint greens and chocolate browns.

This is totally at odds with the pervading scent of wild garlic, which is everywhere. Pretty little white flowers, lush, glossy green leaves, and a smell that makes you wonder where the gas leak is.

On a completely unrelated note, I found a website which might come in handy one day. I never did get the knack of writing my own artist's statements. Check it out here.


art books II

Another look through my art book collection, to recommend some gems for your shelves. This time, I've divided them into two categories: purely instructional, and leading by example, the latter being books about particular artists and their body of work, rather than any teaching. 

In the purely instructional camp, we have - 

Colour and Light in Oils, by Nicholas Verrall and Robin Capon.Nicholas Verrall occupies the area between impressionist painting and straight realism, with his colourful and complex compositions. If you were in a mood to be snide, you could say he picks easy targets: pretty French street scenes, floral arrangements, summer countryside. But if you did this I would jab you pointedly with my index finger, before pointing out how his masterly use of colour makes his complicated subjects work every time. Lesser painters working in the same paradigm often thrash about and hope for the best, but he's notably in control of every aspect of his paintings, especially the colour and tone.

Carlson's Guide to Landscape Painting, by John F. Carlson. John F. Carlson was an American landscape painter of the early 20th century, and his book is regarded as a classic among American landscape painters. Do a Google image search to check out his work. It's a pleasant way to pass an hour.

Painting with David Shepherd, by David Shepherd and Brenda Howley. 'The Elephant Man' is perhaps best known for his paintings of elephants and steam trains, and more recently his work in conservation. I've always admired the genial way he completely ignores 20th century art history, as well as his throwaway rendering skills. In this book he tells you how he does some of the magic. 

You soon realize that the trouble with books that teach you how to paint is that they will all tell you the same thing - how to mix colours, how to apply the paint, what brushes to use - but these things aren't what you want. You want to paint as well as the people who write the books, but the awkward truth is you can only do that through long and arduous practice, after taking their advice on board, and by struggling with your own subject matter and painting methods. 

The Art of Andrew Wyeth, edited by Wanda M.Corn. This was another lucky bookshop find. Published to coincide with a major retrospective at the Fine Art Museum of San Francisco, it offers five essays and many illustrations, colour and monochrome, of the artist's work. The last essay, by E.P.Richardson, is titled 'Andrew Wyeth's Painting Techniques', and covers Wyeth's use of watercolour, dry brush technique, pencil drawing and egg tempera. Why do I like Wyeth's work? Because of his solid, unfashionable commitment to figurative painting, and making art that deals with the look of things. 

Constable: The Great Landscapes, edited by Ann Lyles. This is a detailed, in depth look at a painter with whom we're all too familiar, with four essays and dozens of full colour illustrations. It gives some insight into Constable's occasionally shambolic working processes, particularly his making of full sized sketches in oils as a means of starting his six footers. 

Can you learn how to paint from books? No, you learn how to paint by painting, but reading widely around the subject will save you a lot of time and effort. Good tuition from someone who knows what they're doing is your best bet, but you can pick up useful knowledge from books and DVDs. 


no, actually, they're not your pictures now.


I just found out about this today: 

UK Government passes Instagram Act

If you take photographs, or paint, or otherwise make images that end up online, take the time to read the article.  Not wholly sure of the ramifications as yet, but my spidey sense is tingling, and my knee jerk response to any and all government action is telling me it won't be to my advantage.

Just a year ago I tried to persuade several MEPs that copyright reform is a good thing, and an inevitable consequence of the internet's existence, and that they should vote against ACTA and the whinging of big copyright defenders like the MPAA and RIAA. Now I find myself in the embarrassing position of  wondering if I was altogether correct. 

painting techniques

Back in the 80s, I spent a while painting houses for a living, and I learnt more about applying paint and making it do what I wanted in that time than at any time before or since.

Which is what painting techniques are all about - making paint do what you want it to do. While making five litres of emulsion stretch to two coats on a living room probably isn't your idea of learning how to paint a masterpiece, don't knock it. There's a story about Ingres taking a group of students to watch a house painter at work, and pointing out how he loaded his brush with just the right amount of paint.


The topic does bring up a point I feel strongly about, which is this: any expertise is hard won. Don't dilute it by hopping merrily from one medium to another, as chance and whim dictate. If you start painting in oils, stick to it until you get somewhere. Don't go haring off to try whatever the latest art magazine fad medium is. Art materials manufacturers, like any other business, are on a mission to make a profit, and one of the ways they do this is by making new products for the amateur painter market, which I suspect is their biggest money earner.

Having said that, and sticking with oil painting because it's what I know - what painting techniques are there? Surprisingly few. To get the image you have in your head onto your canvas, you're probably working over a drawing, whether that's a simple outline or a full tonal rendering. You put on paint, using the hairy end of a brush, because that's the right tool for the job. You're working from dark to light because that's the easy and logical way to go about it. This paint matches the hues and values of your subject. So what else do you need to know?

Paint consistency. Stiff, with the oil soaked out by squeezing your paint out onto paper before using it? Or thinned down to a slippery cream, with an oily medium? Or thinned right out with turpentine, to a watery stain? All these have their place. Just remember to paint fat over lean, with more oil in later layers.

Paint thickness. Thin, smooth layers, or thick impasto? Why not both? The contrast between flat areas and impasto can help define different textures and spaces. And glazes over impasto can get some fancy special effects. Look how Rembrandt handled fabrics and flesh.

Transparency. Glazes can alter hue and value, and add a richness of colour you can't reach with a flat layer of paint.

Opacity. Scumbling can push parts of the painting back in space, or enrich dull colour.

Oiling out. Working over an area by first applying a thin layer of oily medium can help you achieve really subtle modelling when you work into it, especially if you let the oil dry a little and get tacky first, so that it drags the paint off your brush.

Brushwork. The marks you make can contribute to the modelling of forms.

Finger painting. The best blending tool you have is the tip of your finger. Just don't pick your nose afterwards.

Different brushes. A fan brush or blender can blend the edges of different colours or tones. A rigger* can make the fine lines you'll never achieve with a flat or a filbert. Sable, or some artificial blend brushes, give you a smoothness of finish you won't get with hogshair brushes. Just don't go buying 'foliage' brushes, or whatever else some marketing genius came up with. 


And none of these things matter at all unless you take pains over every other aspect of your painting: colour, tone, composition, drawing. As with any other skill, when you try to take one aspect of it into consideration, you realize how interconnected it all is. Painting techniques are not a magic solution to painting well. They're more like tools in your toolkit. It's good to have them, and know how, when, and where to use them.

And eventually, after years of painting, they aren't really techniques at all. They're just what you do, without thinking about it, to get the result you want.

* Tom Keating tip: to get really fine lines, lay some varnish, then paint over that with egg tempera, using a sable rigger. The varnish squeezes the tempera thinner as it dries. Personally, I never got that to work without the tempera clumping into little blobs, so I used a dip pen instead.

painting winter landscape

I've begun a winter landscape, working from three small studies done on location in the depths of the recent winter weather.

And here's a pro tip straight from the front line: if you paint outdoors in cold weather, invest in a good winter coat and some hunting mittens. Eat a good breakfast, dress in layers, and always wear a hat and warm socks. Keep your head and feet warm, and everything else in between should be okay.


Once again I'm cobbling together a single coherent view from several kinds of day. First we had bright and sunny, then we had snow and steel grey skies, and lastly we had the thaw.

Take your pick, is the lesson to draw from this, and given that I took a lot of reference shots I can afford to do just that. So I'm thinking of going for a coming snowstorm/ slightly ominous cloud bank/ dramatically lit trees in the background kind of thing.

I'm currently working on a 12" x 24" board that I think of as a test piece for a 24" x 36" canvas, though it will be highly finished, rather than just a sketch - which brings me to a notion I've been thinking about lately. I was raised on the notion that it's okay to do sketchy, unfinished work. There was always an unspoken notion that this was somehow more 'authentic' than a painting that showed signs of long labour or exactitude. It's only lately I've begun to see how fatuous this is, which is why an increasingly large number of art historical figures are being consigned to my out of favour list. 


Constable is safe, despite being criticized in his lifetime for a lack of finish in his paintings. Most of his contemporaries painted in a smooth, layered style that led to a flat, shiny finish, and his occasional broad handling and impasto would have stuck out next to this, but overall he's still tight enough to stay in my good books. The painters I'm beginning to hate are all Impressionists. (I'm a hundred and fifty years out of date. Feels good. I've elected to completely disregard most art done since 1863. I'm also thinking of buying a monocle and a frock coat.)

I've made a rod for my own back with this painting by including too much foreground detail, which will require a lot of close work. Tip #2: never paint anything in a landscape that's less than forty feet away. Not only will you have to slave over foreground details, but you also run the risk of having your painting fail to reconcile the near and distant parts.

art books


There are thousands of art books in print. And you could build a bonfire with most of them and be better off. I'm talking about the how-to-paint sort of book which presumably fills the gaping void left by a standard art college education. (On the foundation course I went to, we had a visit from some scrofulous midget who showed us home made porn videos and seriously suggested making them was a good way to fund an art career. Hey, it was the 70s.) 

Unfortunately, the people who write most of these books evidently haven't a clue. Their horrid paintings give you fair warning on the front cover, but if, despite this, you venture inside, you'll soon discover the truth: most art instruction books are written by people who can't paint or draw. So which art instruction books are worth a look, or better still, worth adding to your permanent collection? Here's a handful of the ones I've read over the years that pass muster, and won't steer you wrong. 

Lessons in Classical Drawing by Juliette Aristides. This includes a companion DVD, and has over 200 pages of excellent tuition for anyone who wants to learn how to draw properly. 

Alla Prima: Everything I Know about Painting by Richard Schmid. Excellent advice about how to paint what you see, expressed in a calm, simple, ordered way. 

Albinus on Anatomy (Dover Anatomy for Artists) by Robert Beverly Hale and Terence Coyle. I picked up a hardback copy of this 18th century classic in The Works for next to nothing. 200 pages of beautifully detailed etchings of the bones and musculature of the human body, taken from the originals by Jan Wandelaar, working for Bernard Siegfried Albinus. It comes with an essay by Robert Beverly Hale, a renowned art tutor whose anatomy lectures can still be seen on YouTube here: 


 The Anatomy of the Horse (Dover Anatomy for Artists) Again, a great find in The Works, in which the great horse painter does for the horse what Albinus did for humans. 

 How To Make A £Iving A$ An Arti$T , by Colin Ruffell. This offers 12 'Golden Rules' for making a living from your work, something that never cropped up in the course of my art education. Anyone out there got any further recommendations? 

overworking a painting

Yeah, this just needs a little bit more...ah.

There are two temptations you can succumb to when you're drawing or painting. One is that you don't do enough. The other is that you do too much. Both are bad. And the safe place between them can be tiny and hard to find.

I was working on a drawing that wouldn't come together. Even though I'd been careful to work all over the drawing to keep it of a piece, it still looked bitty and the composition tried to fly apart.

I finally got it to look right after three sessions on site. 'One more day and it'll look great,' I told myself. And ruined the whole drawing after twenty minute's work on it the next day.

The moral of this story? Quit while you're ahead. Or be prepared to spend a lot of time putting your mistakes right. 'Maybe if I tried this now...' is a line of thought that can lead to hours of work you didn't plan on doing.

And yet I'm reluctant to offer a one size fits all solution to this particular problem. Sometimes - but  only sometimes - it's a good thing to push a drawing or painting past the point where you're guaranteed success. The safe solution can be pretty dull, and exceeding your limits is the only way to grow. At least that's the feel good nonsense I tell myself when I'm wrestling with yet another nosediver.

A wiser head offers this solution: put it away for a while, and do something else. And a while means long enough to forget what the problem was in the first place, before you even look at the painting in question again. Then, analyze what the problem is. When a painting doesn't work, the reason is often this:

When you painted it, you didn't know what you were doing.

Time and distance help you see the flaws more easily, and offer fresh solutions that help you to mend them.


Looks like rain...

Here's a time lapse video of another cloud study:


While small, these studies are a bit labour intensive. They also fulfil their intended function of making the skies in my full sized paintings altogether more convincing. I won't be starting any major works without a sky study to fall back on.

the bumper book of cloud studies

I just noticed my A5 drawing book of cloud studies, done from my landing window since 2010, is crammed full. 


It's come in handy this past few months, particularly in dealing with a major problem in any landscape painting, to whit, painting a convincing sky. Those generic fluffy white cotton wool balls just don't hack it when it comes to making your sky look right.

Leaving a book open on the landing window sill with some art materials next to it turned out to be a good move. Every time I went upstairs and happened to see some particularly fine cloud formation, I could spend the next ten minutes getting it down on paper without having to hunt for paper and paints.

I used a watercolour from it as the basis for the cloud study featured here:


The drawback is that since my landing faces south, all I have is back or side-lit clouds. Time to start a new book facing north.


still life painting

I hadn't done a still life painting for a while, so I thought I'd take a break from landscapes and try a small still life.

Took an apple and a piece of cloth. Found a small primed board. Set up easel and palette and painted. And filmed it.

Painting still life is like the easy, laid back version of painting landscape. The light stays the same, nothing moves, and you're never bothered by livestock. Plus it's probably not raining and you can make tea whenever you want. And paint sitting down.

You people have got it easy.


how to do a studio landscape painting from plein air studies

There are some plein air purists who only paint in the open air, starting and finishing their paintings on site.

The best part of what I paint always happens in the studio. 


But it always depends on what I bring back from my painting expeditions. I work on small studies outdoors, usually a primed 10" x 12" MDF panel.

In this case I ended up with three studies from the same scene, done over a few days, at the same time of day, in similar weather and lighting conditions. Laying them out together, I saw they could be the basis of a larger painting. 


I took a 24" x 36" canvas, tinted it with Light Red, and gridded it up with drawing pins and cotton thread to match the grid on a printout of a photograph of the studies.

I copied the drawing from the printout to the canvas, removed the thread, and was left with a canvas ready to be painted.

Painting from the studies worked well, but the sky was still not decided on. 

I made several colour studies of the kind of sky that would suit the painting. I looked at Constable's paintings, and took ideas from him: the dark grey cloud cut by the top edge of the picture, to give scale and dramatic impact; cumulus clouds in perspective to give depth and movement; different textures and lighting effects, to give convincing scale and realism.

The sky had to complement the land below it and match and reinforce the mood of the painting. I was after the cool, windy, damp atmosphere of an early autumn day, with the threat of rain in the air, but the sunshine still coming through the clouds.

I blocked in a thin scumble of pale blue to cover the light red underpainting, and decided to leave the painting alone for a while.


After a week's break I resumed painting, first on the shrub on the left, working into a thin layer of oil and turpentine. This made the paint application sticky and draggy, which allowed some fancy pants painting, stippling and dragged lines which helped to create the illusion of foliage and twigs.

The next day I began to lay in the sky. I stole some dark clouds from Constable's 'The Lock'. The grey, the darkest in the sky, was a surprisingly light number 3 on a 10 step scale between black and white. I mixed it with French Ultramarine and Raw Umber and Titanium White, and started painting the clouds...

And after a while I took a rag and wiped off all I'd done. It wasn't good enough to work as well as I wanted.


I also worked on the foreground, using the photographic reference shots I'd had printed. Note, at no time did I use any brush smaller than a quarter inch flat. Always work from big to small, and stop well before you end up fiddling with a one hair brush. If it looks good at viewing distance, it's good enough.

I was particularly happy with the painting of the bare hawthorn bush on the far right. To paint this, I laid a patch of sky blue, and while it was still wet worked in some wet brush strokes of a dark grey mixed from French Ultramarine and Burnt Umber, fanning them with a large flat brush to make a grey bush shape. When this was dry, I worked back into the grey with more of the sky blue, to carve out masses of twigs. It worked well, much better than trying to paint tiny individual twigs and branches.

The second attempt at the sky went well. I oiled out the whole area using liquin thinned with turpentine, then worked into this with transparent washes of the same #3 grey, applied with a rag in big shapes, then brushed out to make clouds.

Keeping the sky transparent, using what is essentially a watercolour wash technique, only in oil paint, is a technique that worked. As did using a rag and big brushes to avoid getting fiddly.


Later, I took a long look at the unfinished painting and made a list of the parts that needed work. I tackled these one at a time until I was satisfied with all of them. 


Except a large painting never is really done. You can always find something you want to change, but at some point it's best to let go and put it aside. I ordered a frame online and started to think about the next painting.

When this painting is thoroughly dry, it'll have to be varnished. That's a topic for another day.


Support:

Winsor & Newton Linen Canvas, 36" x 24"


Paints used:

Titanium White
Cadmium Red
Spectrum Orange
Cadmium Lemon
Yellow Ochre
Opaque Oxide of Chromium
French Ultramarine
Raw Sienna
Burnt Umber


Mediums:

Turpentine
Linseed Oil
Liquin


Brushes:

2" Household Gloss Brush
1" Hog Bristle
Nylon Flats, half, quarter, and eighth inch
Various fan brushes and riggers
Rags
Fingers


Frame:

Bramptons Gold 72mm moulding, number 684117246.